Creating Your Own Algorithm
If you have a custom algorithm that you would like to run on a SWARM Node, you can do so by following the instructions below. These instructions assume that you are somewhat familiar with the SWARM RDS Client and have a basic understanding of how the system works.
Step 1
First, you will need to create a new folder called user_code in the SWARM-RDS-Client repository if there isn't one already there.
Step 2
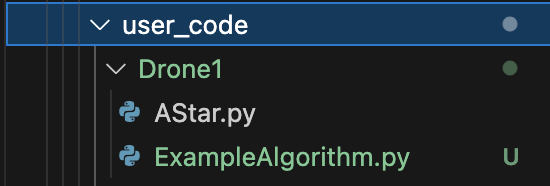
Inside of this folder, you need to create a new folder that is exactly the name of the agent (ie. drone, vehicle, etc.) that will be used in the Simulation. For example, if I wanted to create a vehicle called Drone1, then I would create a folder called Drone1 inside of the user_code folder. Your file structure should look as follows:

Step 3
Next, you will create a new python file (.py) that must be the exact name of the Class that you will create. For example, if I had an algorithm called MyAlgorithm, then I would create a file called MyAlgorithm.py inside of the Drone1 folder. Your file structure should look as follows:

Step 4
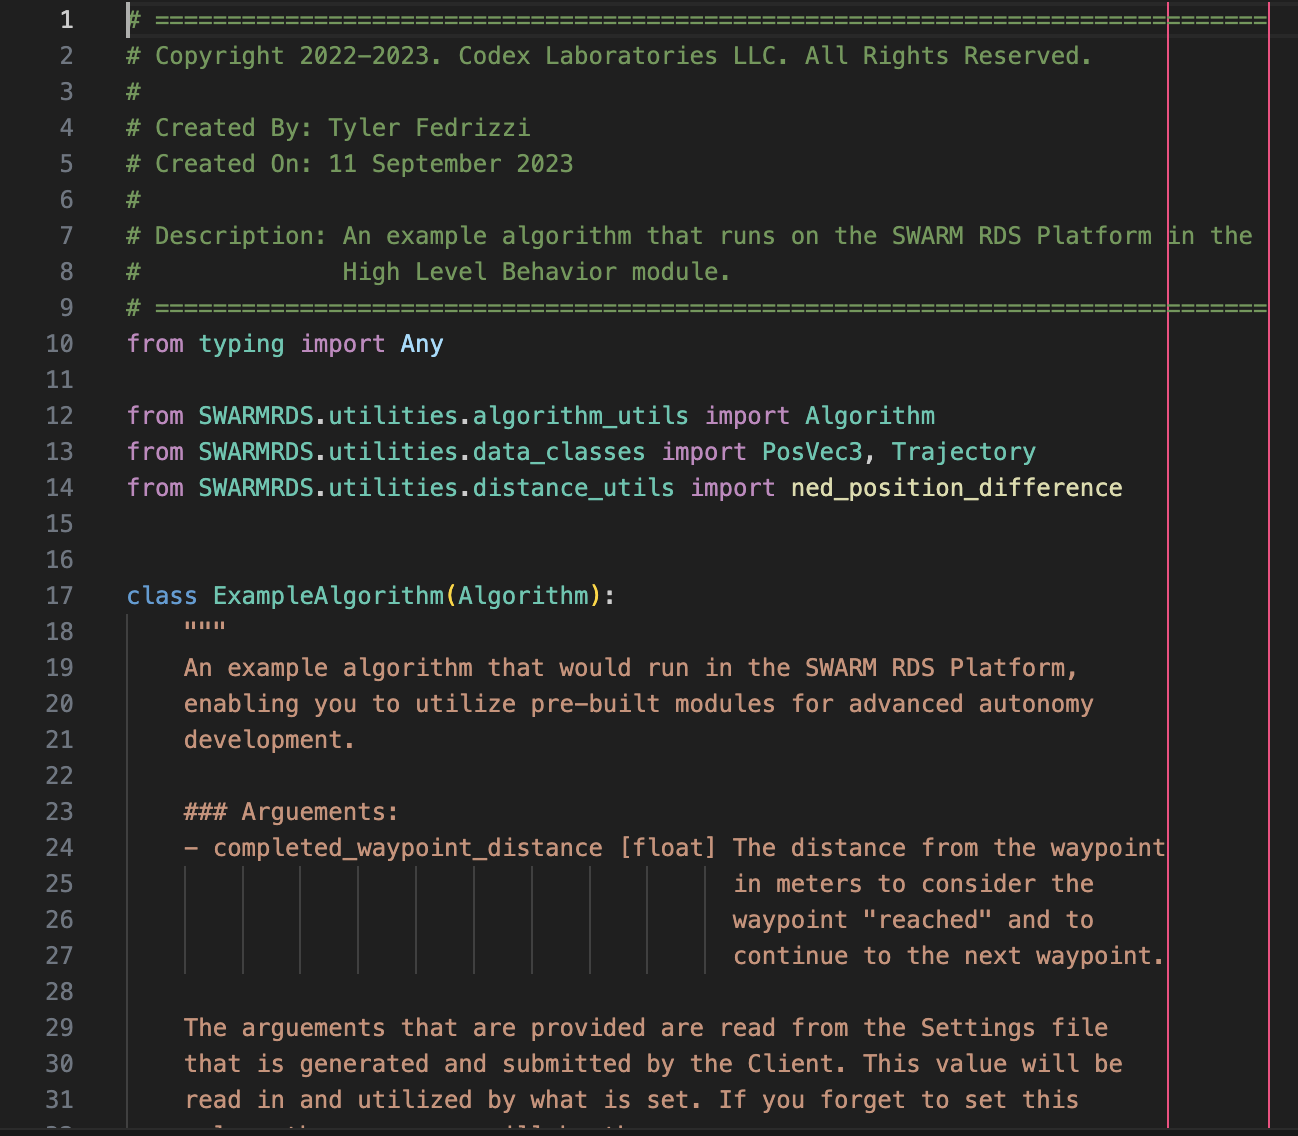
Now, you will need to create your algorithm. We have provided a template below that you can use to get started. You can also find this template in the SWARMRDS/utilities folder with the file name algorithm_template.py.
There are only two requirements for your algorithm:
1. You must inherit from the Algorithm class that exists in utilities/algorithm_utils.py. Please reference the template File
for how to import this class into your file.
2. You must implement the run method. This method is called every time the SWARM Node is updated. You can use this method to
complete any computation that you want. The return of this method is specific to the settings that you provide (ie. what values you tell the
SWARM Node to publish). You can find more information about the settings here: Settings.
Please refer to the file "SWARMRDS/utilities/data_classes.py" to see what data types are availabe in your algorithm and how to work with them.
Step 5
Once you have create your algorithm, you need to add it to the set of of custom algorithms available for selection in the Software SoftwareModules section of the application. To do this, open the SWARM RDS Client and create a new Simulation, choosing any Mission that you like.
Next, set up your simulation and agent settings as you normally would. Once you have done this, click on the "SoftwareModules" tab. Choose the module that will host your algorithm, such as "HighLevelBehavior".
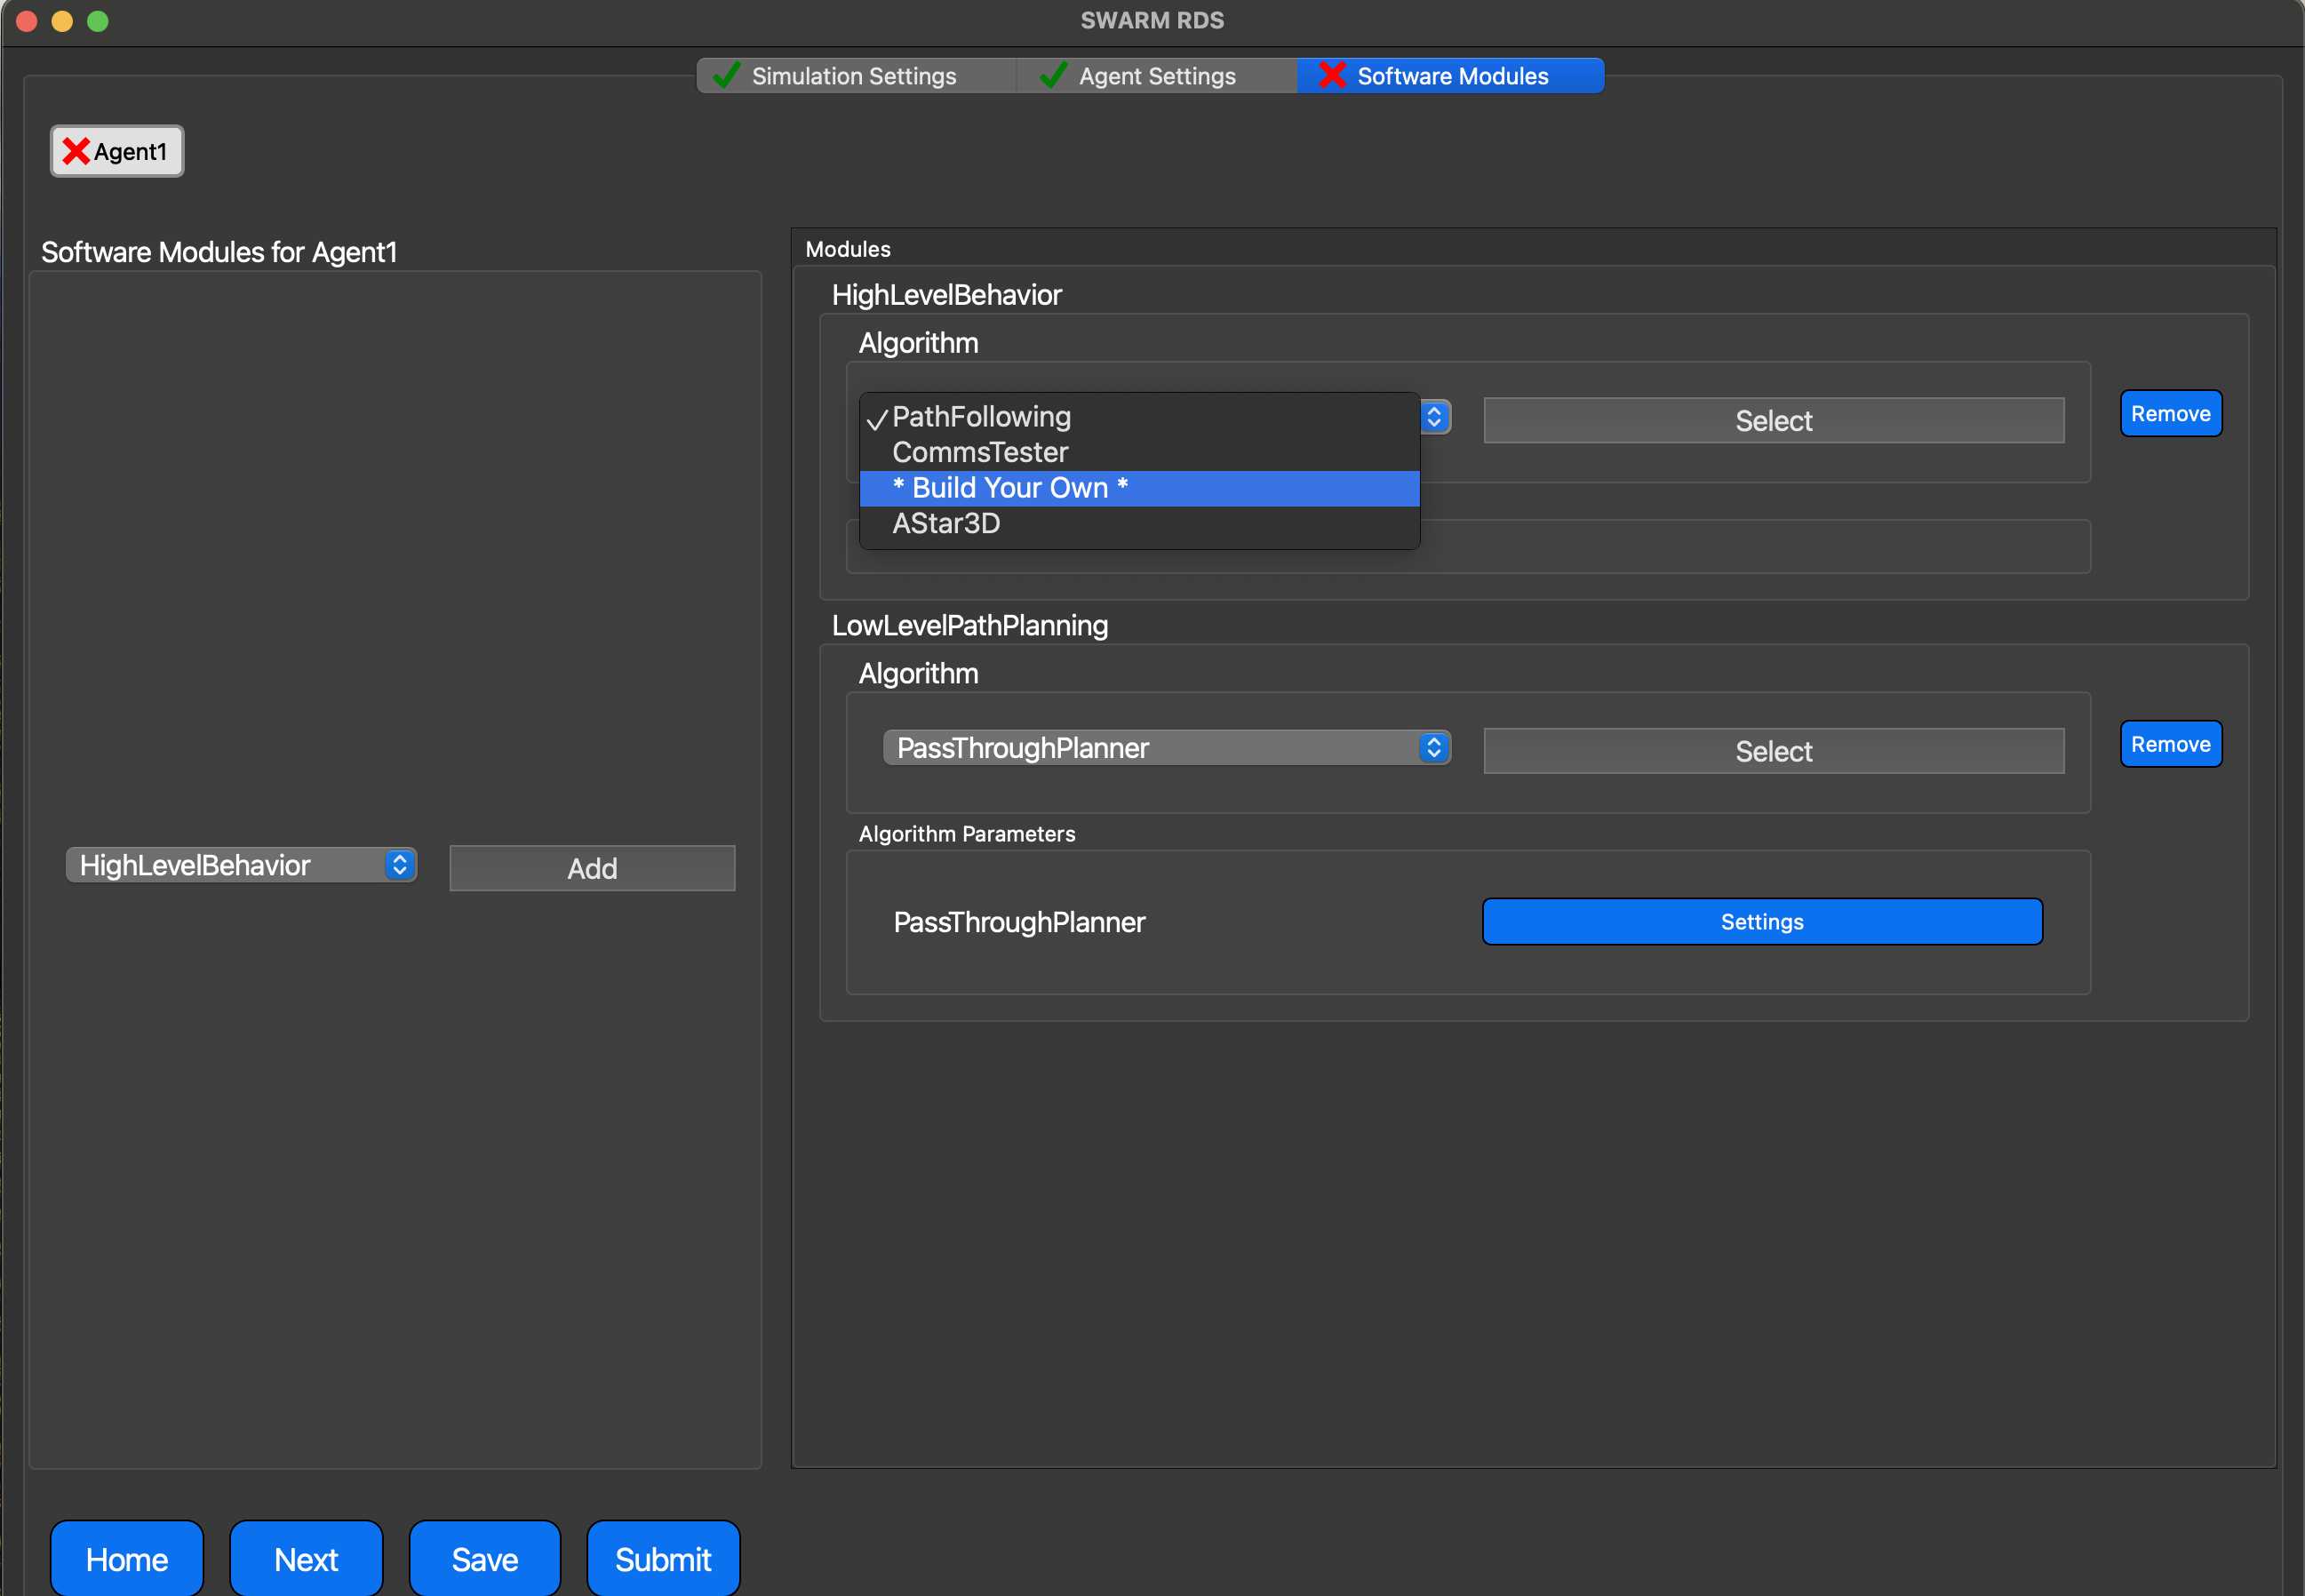
Now, choose the "* Build Your Own *" option for the algorithm and click "Add".
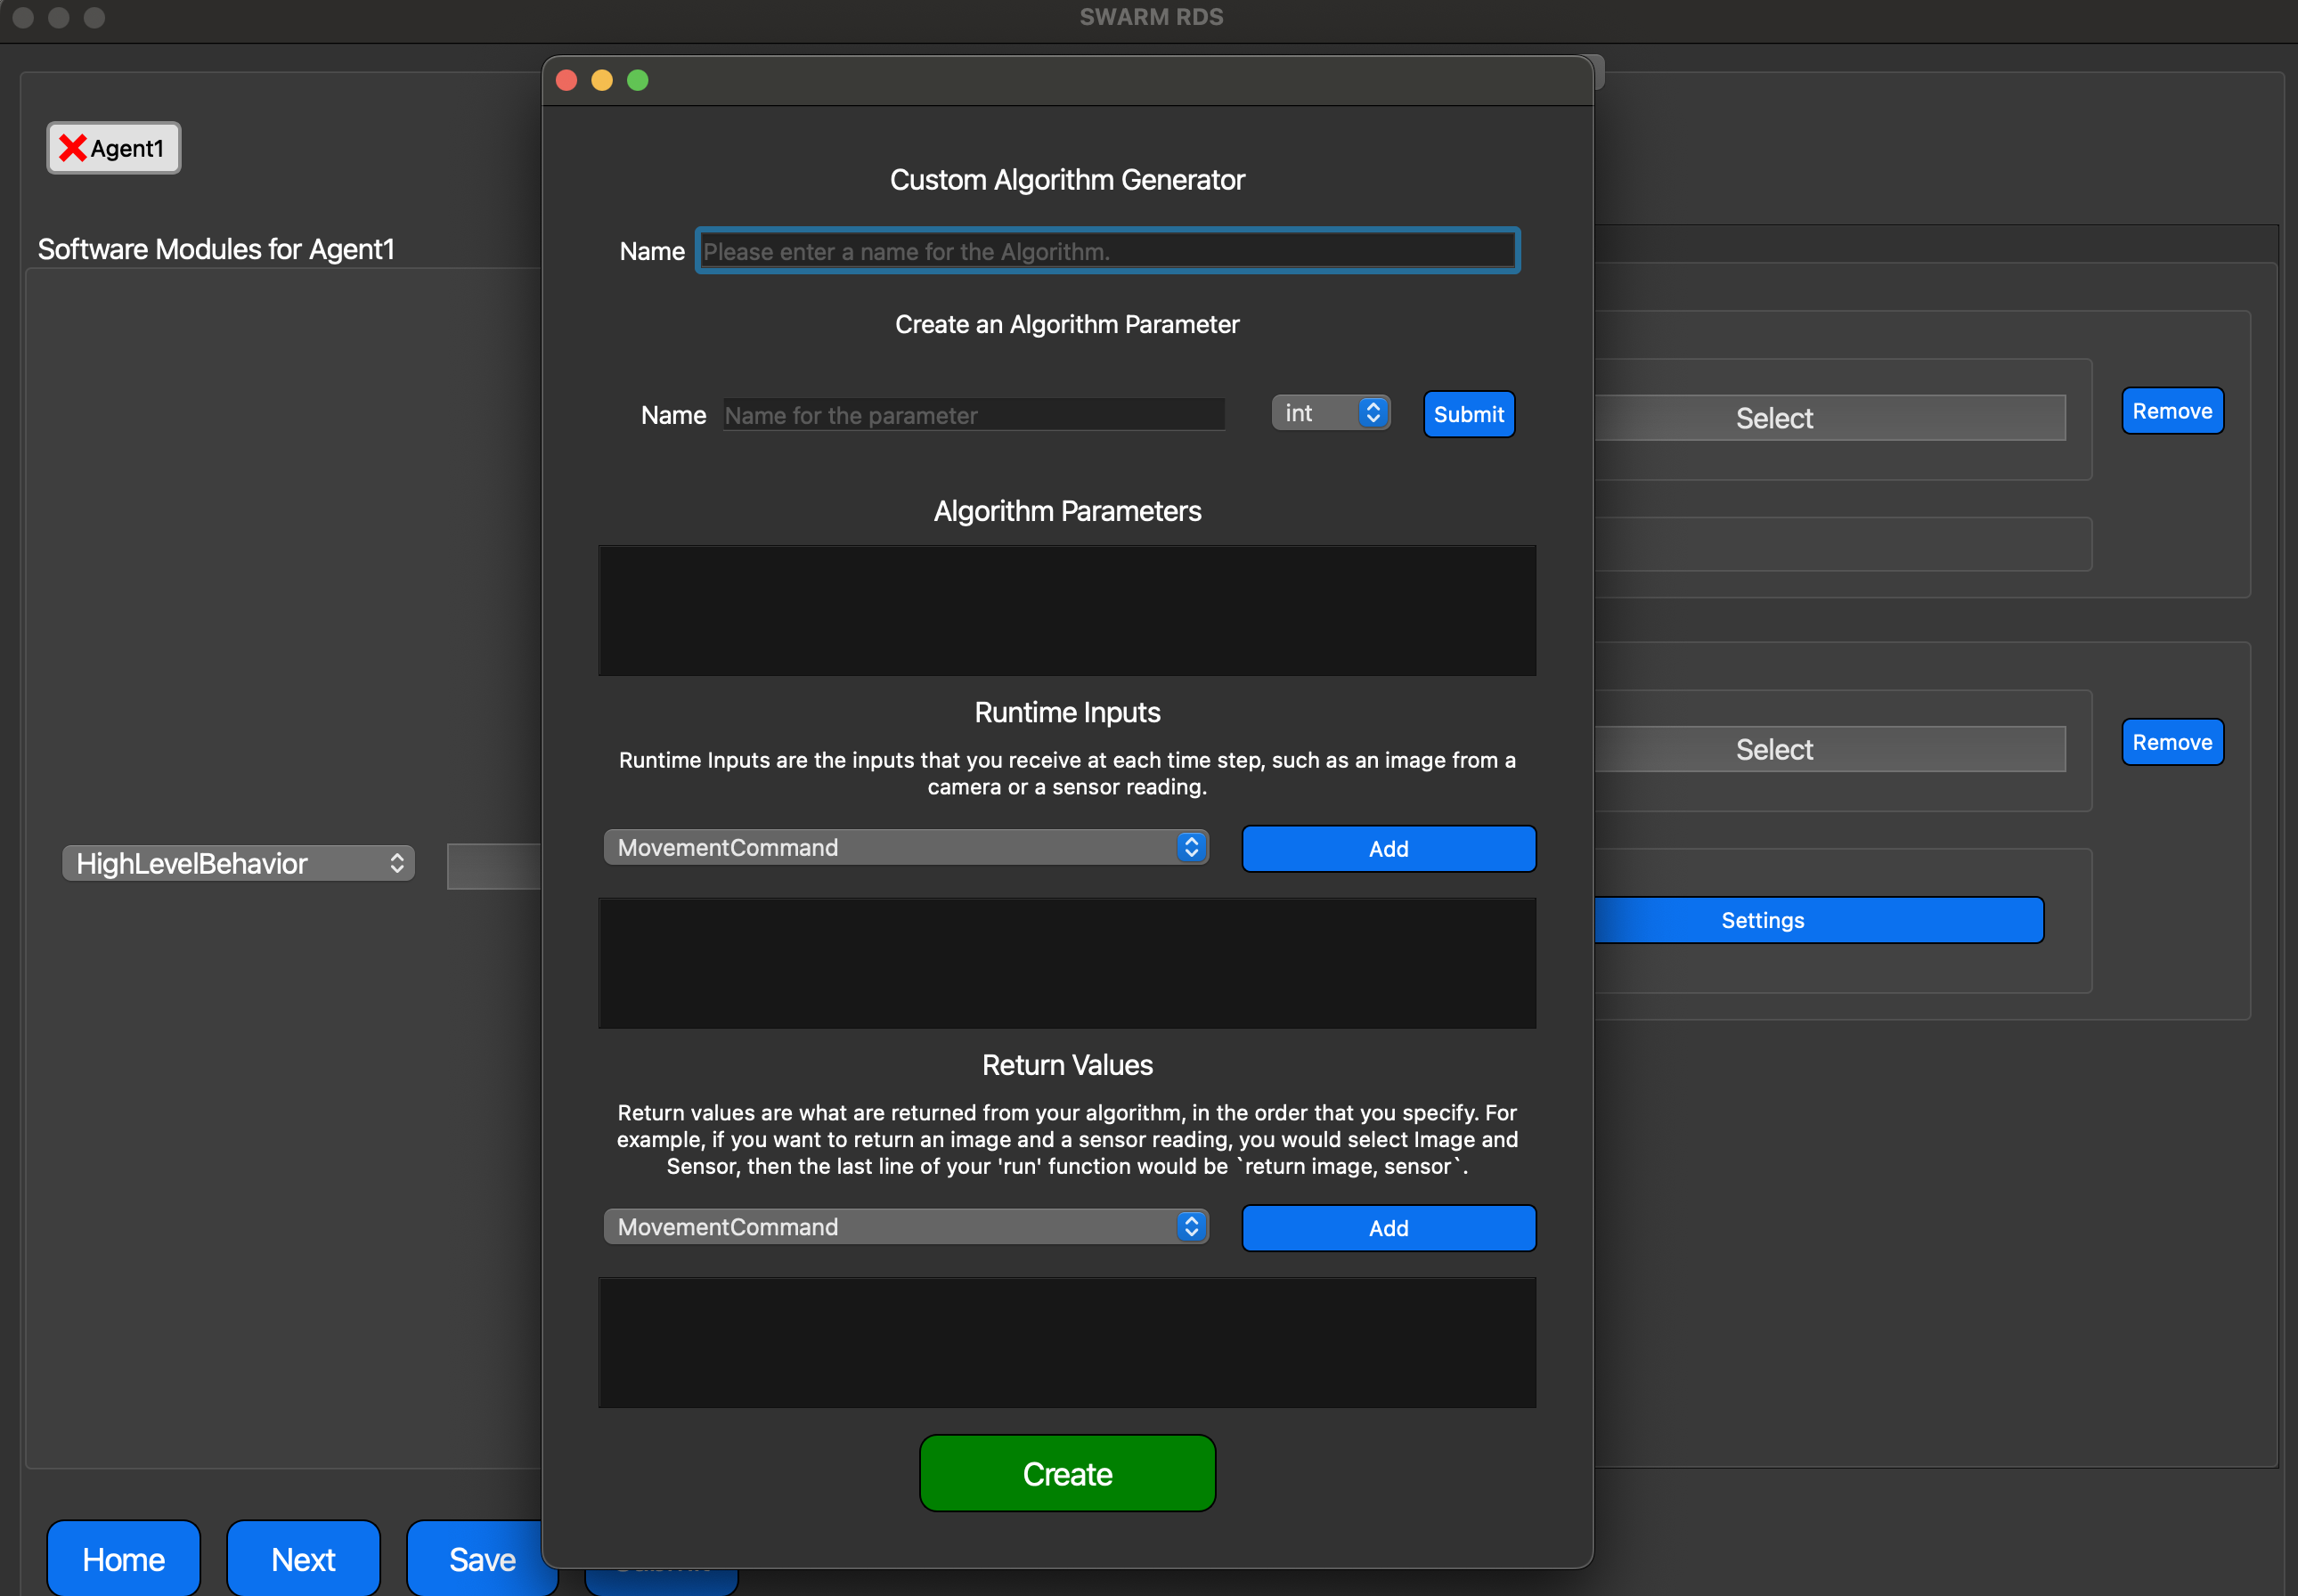
- Algorithm Name is the Python name of the Algorithm you are going to create. So, "ExampleAlgorithm" is an example name of both the Python class and the name used for selection. No spaces are allowed in this name!
- Algorithm Parameters are the inputs for the `__init__()` method of the python algorithm. Each of these parameters has a data type associated with it for validation purposes. Add as many as you want and provide the data type so that the field comes up. **Note** You do not receive any data (images, sensors, etc.) from these parameters. The "Runtime Inputs" section is where you can choose that.
- Runtime Inputs are the inputs in the **kwargs python dictionary that are available at each time step of your function. So, for example, if you put "Image" as an input, then a M x N image will be provided to you based upon the Camera input that is associated with that module. You can find more information about each data type in the "Data Classes" section of the documentation.
- Return Values the outputs of the "run" function that you wrote for the algorithm in the previous step. These outputs MUST be in the SWARM data types that are provided in the "Data Classes" section of the documentation. If you do not provide the correct data type, then the algorithm verification process will fail!
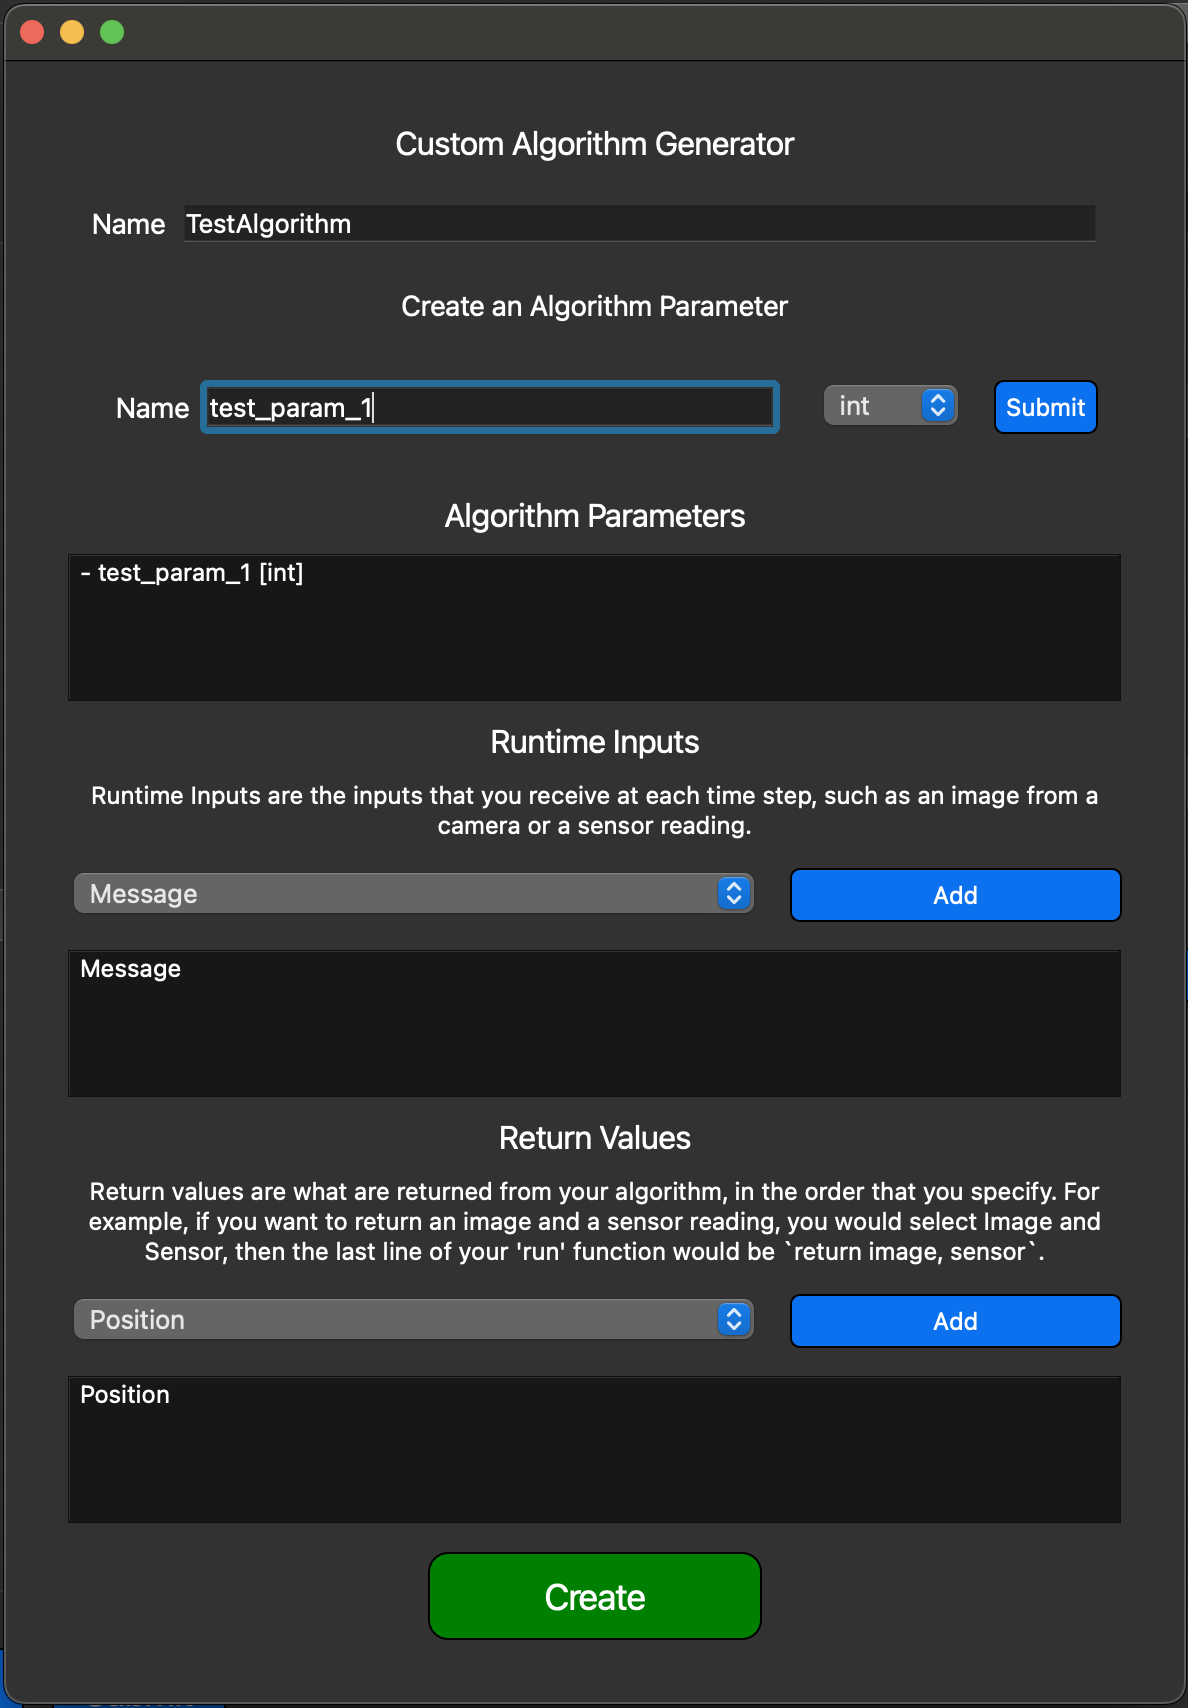
Click Create This saves a template in the "user_code/CustomAlgorithms.json" that is utilized to load the appropriate parameter forms when selecting this algorithm in the system.
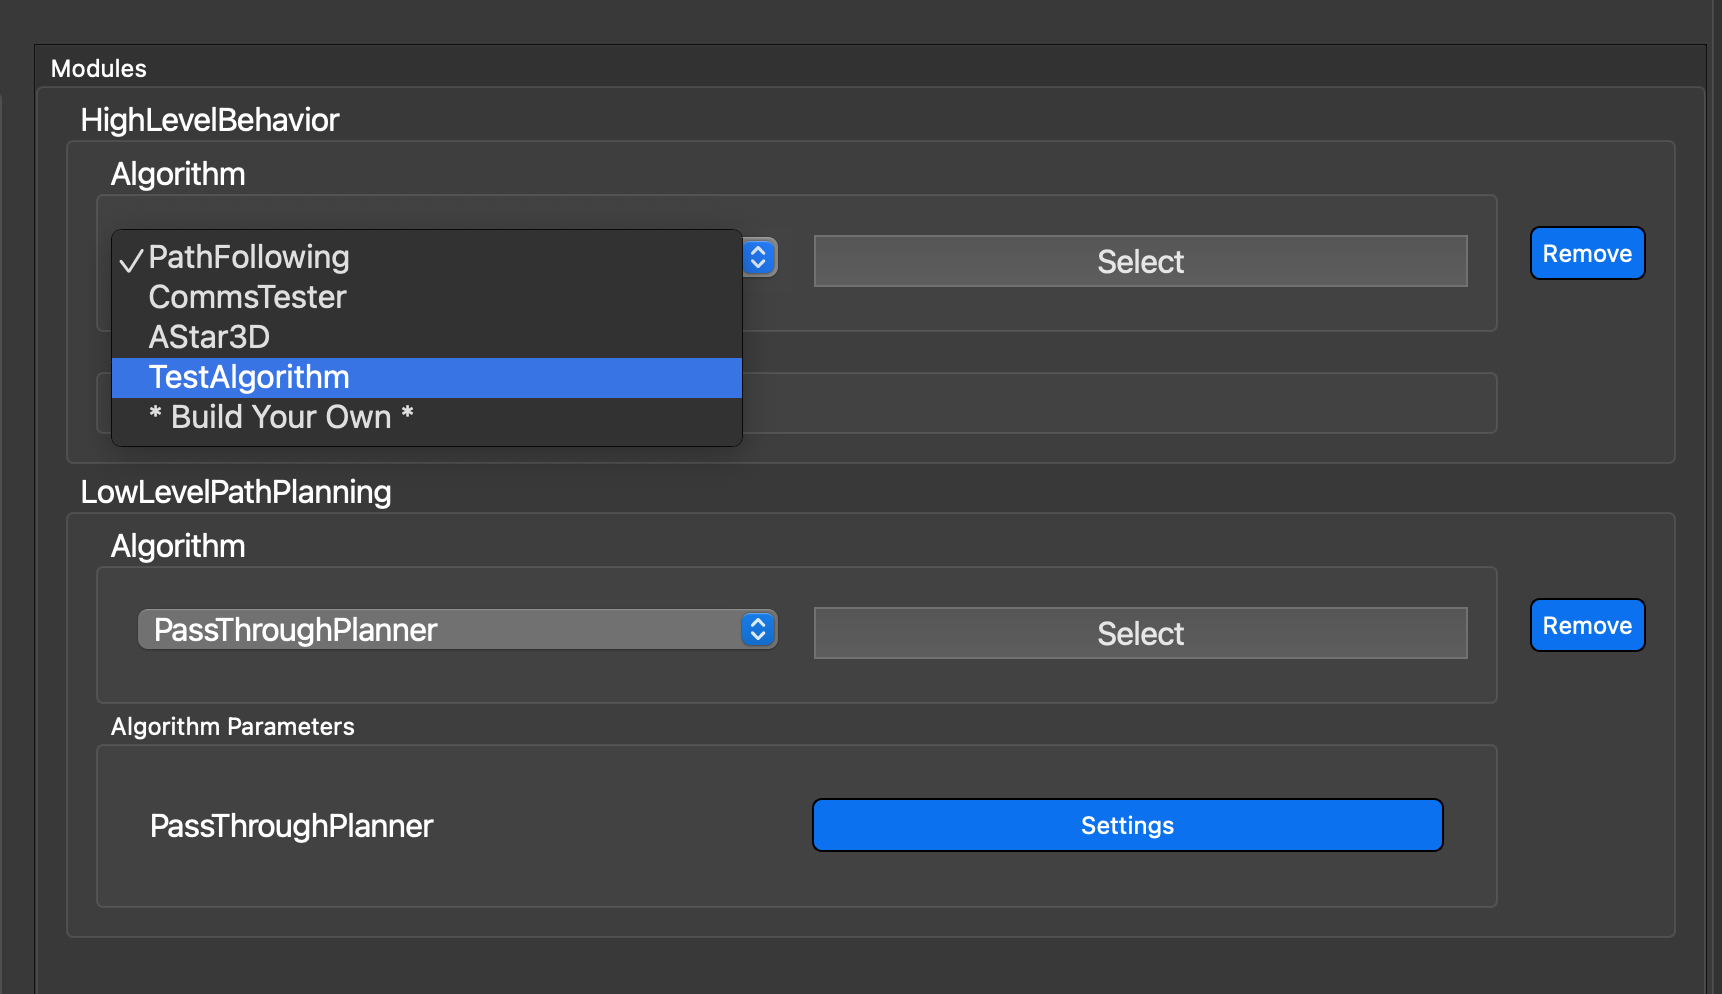
Now, click the Algorithm Selection drop down again and you will see your algorithm in the list. Select it and click "Add". You will now see the settings form, with the selected parameters, inputs and outputs. Make sure to also include the publish and Subscribe topics for the module for this algorithm!
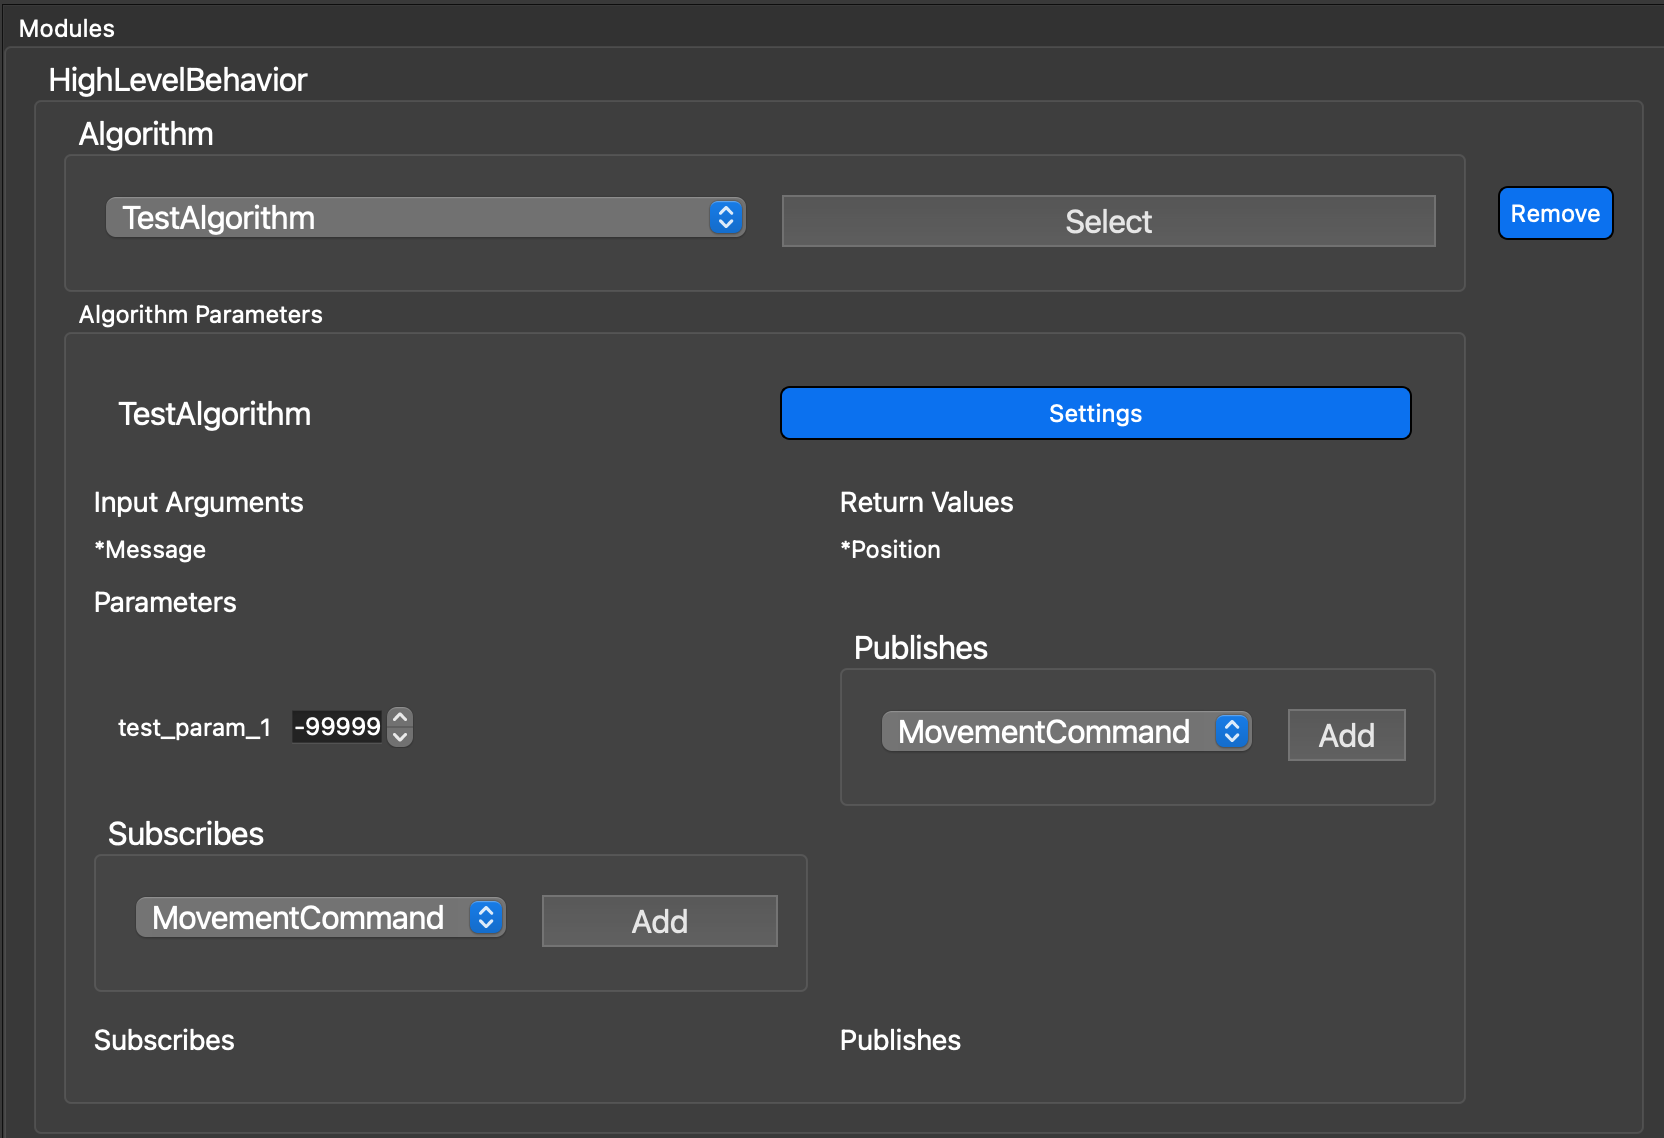
Step 6
Once you have saved your settings, you can now submit your simulation. You will see validation feedback in the Client and then can view the results of adding your algorithm.
About Validation
The SWARM RDS Client will validate your algorithm before submitting it to the SWARM RDS Server. This validation process will ensure that your algorithm will run on the SWARM RDS Server. If you have any errors in your algorithm, then you will see an error message in the console. If you have any warnings, then you will see a warning message in the console. If you have no errors or warnings, then you will see a success message in the console.
Each "validation" run takes an example set of data (ex. a real image) and provides that as part of the **kwargs arguement to the "run" function of your algorithm. Then, the validation system looks at the outputs. The ONLY aspect that is checked about your algorithm is that the function runs and produces the correct number of outputs. It DOES NOT check that right type of outputs (as you could return None if you wanted to). If you see errors becasue of this, then you need to validate your algorithm using our "AlgorithmTester.py" script available for you in the "user_code" folder.
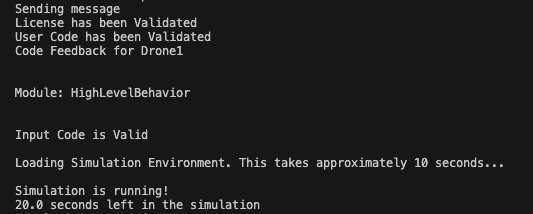
You will see that the simulation file is being validated. Once the system has uploaded your configuration
file, you will see the following output.
The SWARM RDS Server will provide your algorithm with a set of fake
data to validate that your algorithm will actually run. If your algorithm does not run, then you will see
an error message in the console.
Step 7
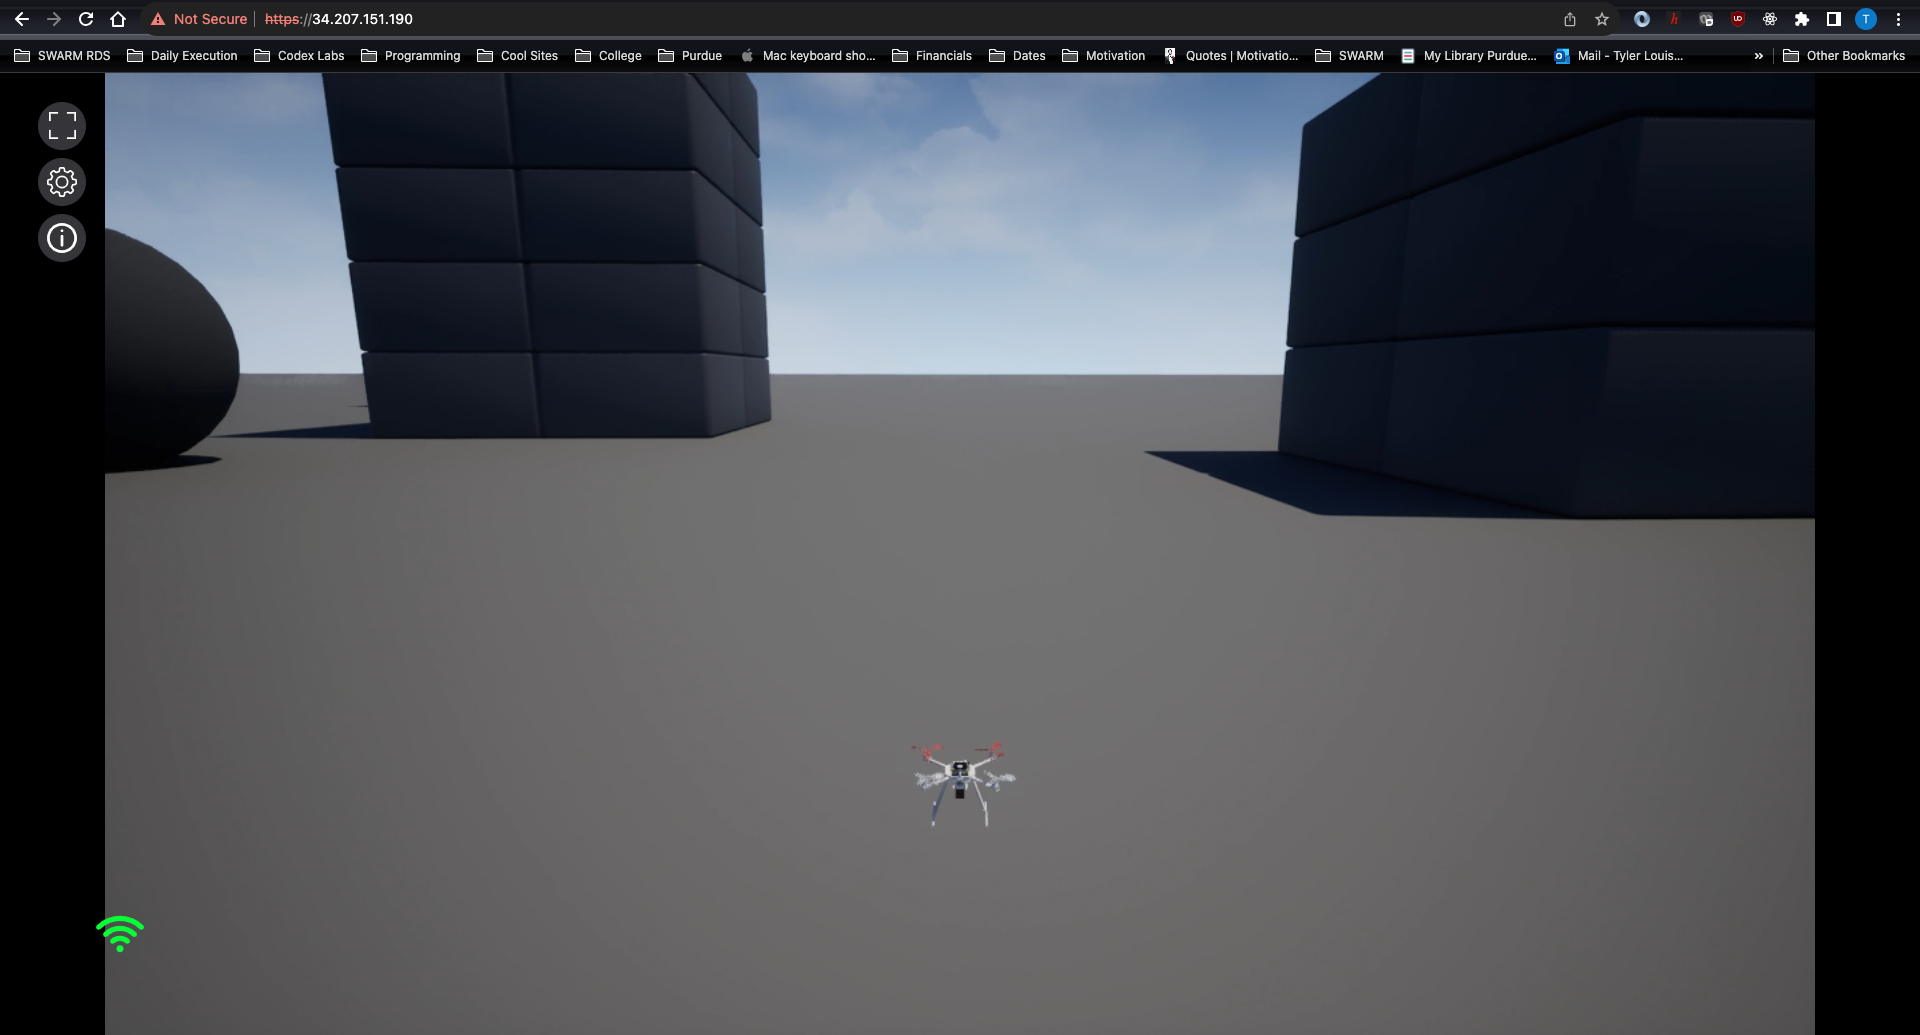
You can visualize the simulator ouptut by starting your favorite Web Browser by either typing in "127.0.0.1" if you are using the local edition or clicking "Launch Streamer" on the RDS CLient application. You will see a gray screen, like below. Click on the
screen to start the visualization.
The agent should move along the path defined in "settings/DefaultTrajectory.json".
Walkthrough
Coming soon, we will have a video describing setup with the GUI application.