Building Algorithms with SWARM RDS
Introduction
Now that you are familiar with the SWARM RDS platform and you have hopefully run a Simulation or two, you are now ready to start developing algorithms with our platform. We wanted to outline a general procedure for developing algorithms, including how we usually think about doing development. You can follow this guide whether you are using the Local or Cloud versions.
Getting Started
First, you will need to ensure you have followed the instructions for installation: Installation Guide.
Next, we can now take a look around the SWARM RDS Client, located at: https://www.github.com/codexlabsllc/SWARM-RDS-Client.git.
Where to Place Your Code
As you can see from the directory list, there is a folder called user_code in the root of the project. This is where you will place your code.
Inside of this folder, there are multiple folders with names like "Drone1" and "Drone2". Please change these names for the agents you will utilize!
Folder Naming Conventions
You must use the name of the agents as listed in your Simulation Settings file!
Writing your Algorithm
Once you have created the folder for your agent or agents, you are ready to begin developing! Create a new Python file and name the file the exact of the Class that you will create for your Algorithm.
File Naming Conventions
Your Python file must have the exact name of the class that runs your algorithm.!
Example
If you are creating a class called MyAlgorithm, then your Python file must be named MyAlgorithm.py.
You can then find a template for the Algorithm that you need to write.
from SWARMRDS.utilities.algorithm_utils import Algorithm


class MyAlgorithm(Algorithm):
    def __init__(self, agent):
        super().__init__(agent)

    def run(self, **kwargs):
        pass
In the above file, you must define the run and it must accept the key word arguements option. This is how the SWARM RDS Client will pass information to your algorithm. Ensure that you iterate through the kwargs dictionary to find the information you need. See "AStar.py" for an example of looking for an input called "OccupancyMap".
Running Your Algorithm
Once you have written your algorithm, you are ready to get running.
Setting up the Settings File
First, you need to decide which module to run your software in. We have a number of pre-built modules, which handle all aspects of running your algorithm and integrating with the rest of the nodes. For example, if you are writing a planning algorithm, you can use the HighLevelPathPlanning module. You will be able to set all of the parameters for your algorithm in the settings file.
Add a module, like the one below, to each agent you are using in the SoftwareModules section.
"HighLevelPathPlanning": {
    "Algorithm": {
        "Level": 3,
        "States": [],
        "Parameters": {
            "goal_point": [
                30.0,
                25.0
            ],
            "map_size": [
                100.0,
                100.0
            ],
            "starting_point": [
                0.0,
                0.0
            ],
            "resolution": 1.0,
            "agent_radius": 1.5,
            "flight_altitude": -3.0
        },
        "InputArgs": [
            "OccupancyMap"
        ],
        "ClassName": "AStar",
        "ReturnValues": [
            "Trajectory"
        ]
    },
    "Publishes": [
        "Trajectory"
    ],
    "Subscribes": [
        "OccupancyMap",
        "AgentState"
    ]
}
Let's walk through the different sections.
Algorithm- ClassName - The name of the Python class you created. This must be exact!
- Level - Set this to 3. We are working to modify this value.
- States - Leave this as a blank array (ie. [])
- Parameters - This is where the inputs to your Python class go. They must be exactly the same (ie. if I have a parameter called param_1, that is how you should make the dictionary entry! Note that your parameter can be any valid Python datatype that is pickleable.
- ReturnValues - The specific type of data that your are publishing. This must be one of the SWARM data types (ie. PosVec3, Trajectory, etc.) that exists in SWARMRDS/utilities/data_classes.py
- InputArgs - The data that you receive in the kwargs arguement of the run function. This information is automatically provided to you.
The specific type of data that your are publishing for this module. This must be one of the SWARM data types (ie. PosVec3, Trajectory, etc.) that exists in SWARMRDS/utilities/data_classes.py.
SubscribesThe data that you receive in the module. Publishing and subscribing are handled automatically by the SWARM RDS platform.
SWARM Modules
As shown above, each Module has an algorithm associated with it. This enables concurrent, multi-process execution of the autonomous agents.
Each module runs independently and provides a log file that can be downloaded at the end of the simulation. See Modules & Algorithms for more information about each Module and the available algorithms pre-built for each module.
Note -
You can create a custom algorithm for any module and replace the current algorithm. Just follow the steps in this guide.
Iterating on Development
Once you have set up your settings, you are ready to submit your simulation. Fire up the SWARM RDS platform and follow the steps for the version of the platform you are using (cloud or cli).
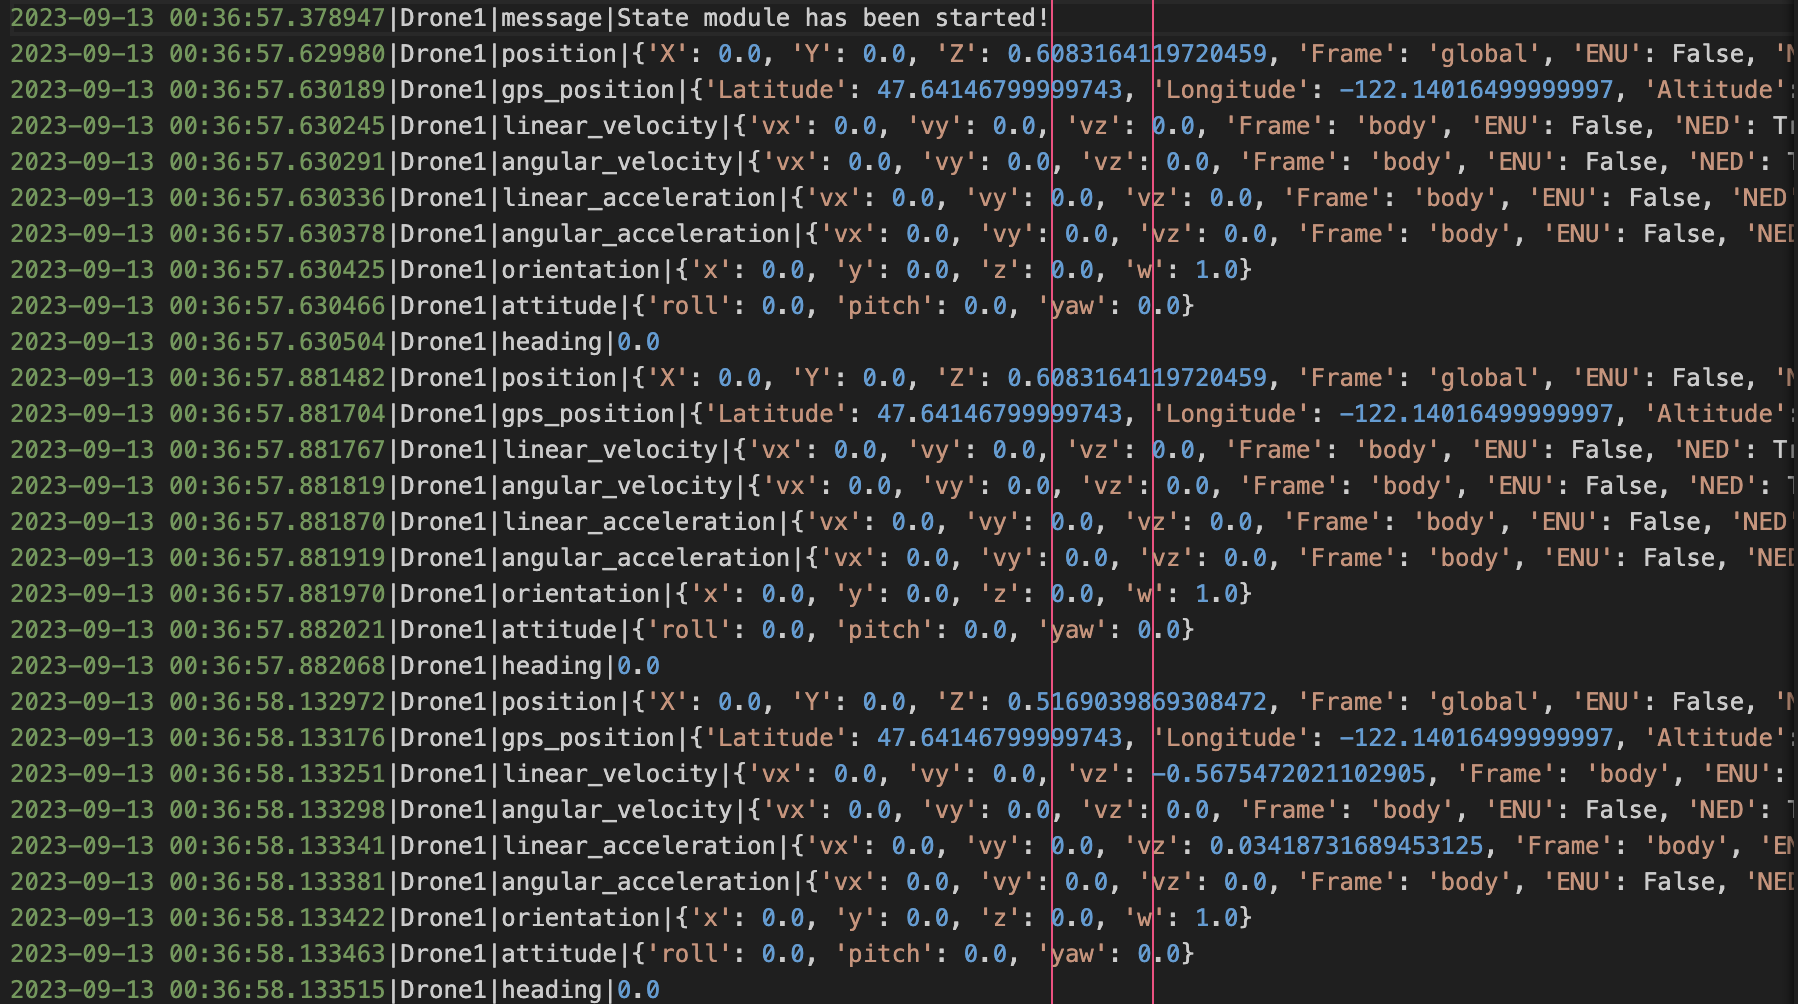
Once the simulation is completed, data will be downloaded to the data folder in the root of the project. Each software module has it's own log file and you can view your log statements there as well. Below is an example log file of what you can expect. We also provide a DataBrick.json file, which is a parsed version of the logs files that you can easily import into data processing applications.

Conclusion & Next Steps
We are working to improve this process and always welcome feedback on how we can improve this feature! The SWARM platform enables you to quickly and easily get up and running with new algorithms. You can iterate, change parameters and continue to quickly test your algorithms. We hope you enjoy using the platform and we look forward to seeing what you create!
Next, try it for yourself! Please contact us if you have any issues!